| Internet Tools |
| |
| Configuring your Network |
| |
| To communicate with other computers, computers need a network connection. This is accomplished by having the operating system recognize an interface card (such as Ethernet, ISDN modem, or token ring) and configuring the interface to connect to the network. |
| |
| The Network Administration Tool can be used to configure different types of network interfaces. |
| |
| It support following types of network interfaces: |
| |
. Ethernet
. ISDN
. modem
. xDSL
. token ring
. CIPE
. wireless devices
|
| |
| To use the Network Configuration Tool, you must have root privileges. To start the application, go to the Main Menu Button (on the Panel) => System Settings => Network, or type the command system-config-network at a shell prompt (for example, in an XTerm or a GNOME terminal). If you type the command, the graphical version is displayed if X is running, otherwise, the text-based version is displayed. To force the text-based version to run, use the system-config-network command. |
| |
|
| |
| To configure a network connection with the Network Configuration Tool, perform the following steps: |
| |
1. Add the physical hardware device to the hardware list.
2. Add a network device associated with the physical hardware device.
3. Configure the hostname and DNS settings.
4. Configure any hosts that cannot be looked up through DNS. |
| |
| Configuring LAN with Network Configuration tool |
| |
| To establish an Ethernet connection, you need a network interface card (NIC), a network cable (usually a CAT5 cable), and a network to connect to. Different networks are configured to use different network speeds; make sure your NIC is compatible with the network to which you want to connect. |
| |
| To add an Ethernet connection, follow these steps: |
| |
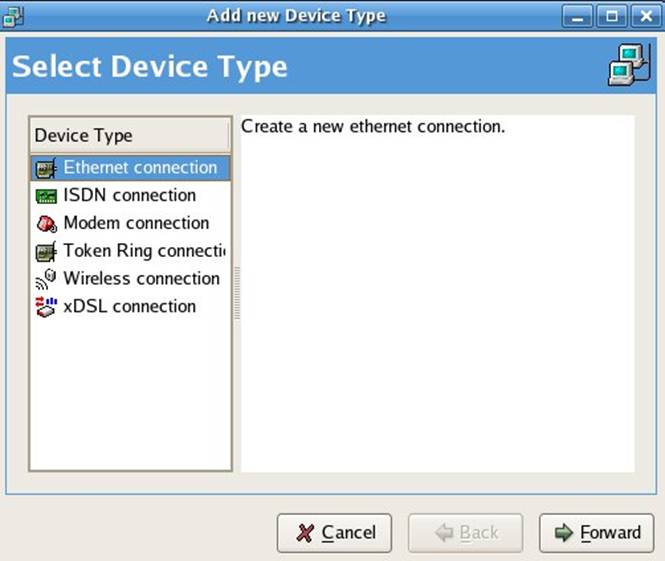
1. Click the Devices tab.
2. Click the New button on the toolbar.
3. Select Ethernet connection from the Device Type list, and click Forward.
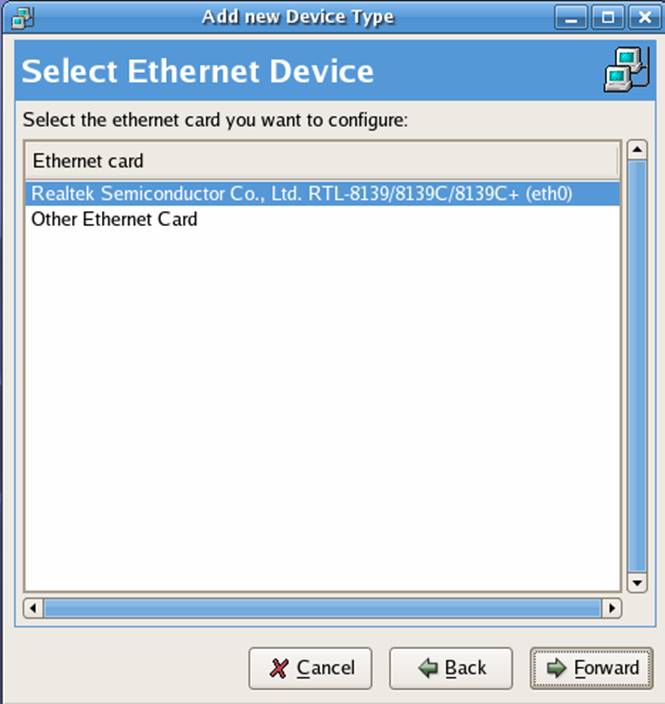
4. If you have already added the network interface card to the hardware list, select it from the Ethernet card list. Otherwise, select Other Ethernet Card to add the hardware device.
; |
| |
|
| |
| 5. If you selected Other Ethernet Card, the Select Ethernet Adapter window appears. Select the manufacturer and model of the Ethernet card. Select the device name. If this is the system's first Ethernet card, select eth0 as the device name; if this is the second Ethernet card, select eth1 (and so on). The Network Configuration Tool also allows you to configure the resources for the NIC. Click Forward to continue. |
| |
|
| |
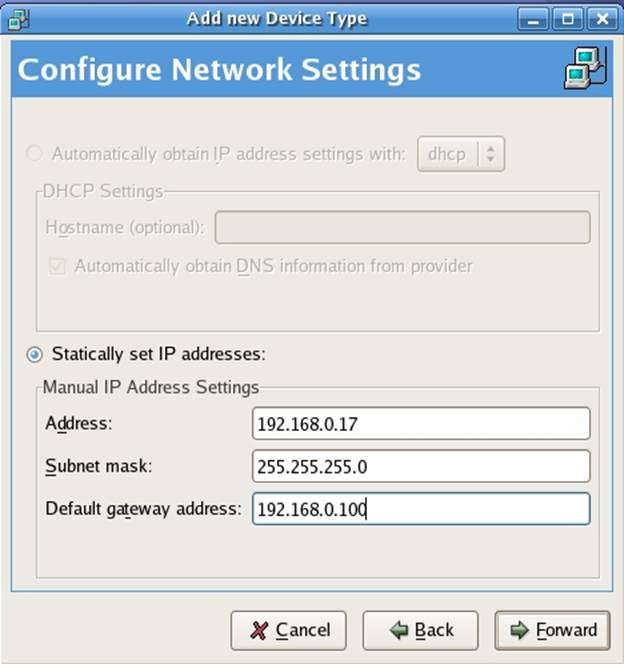
| 6. In the Configure Configuration Settings window as shown in the figure below, choose between DHCP and a static IP address. If the device receives a different IP address each time the network is started, do not specify a hostname. Click Forward to continue. |
| |
|
| |
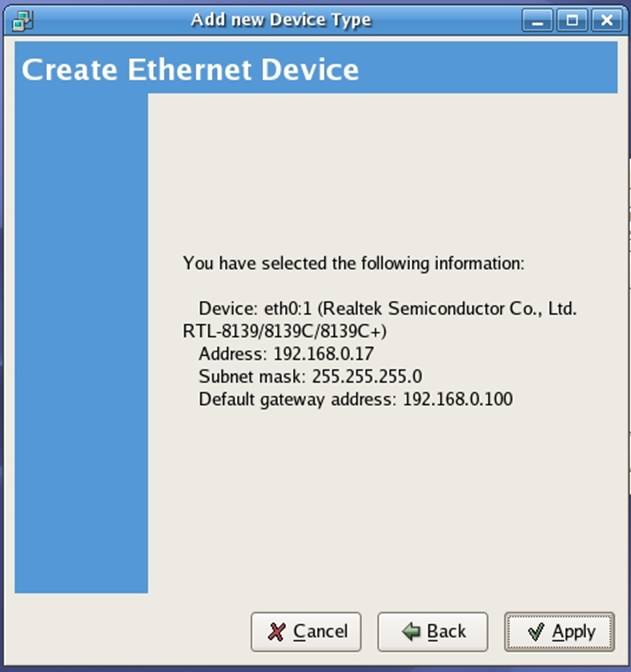
| 7. Click Apply on the Create Ethernet Device page. |
| |
|
| |
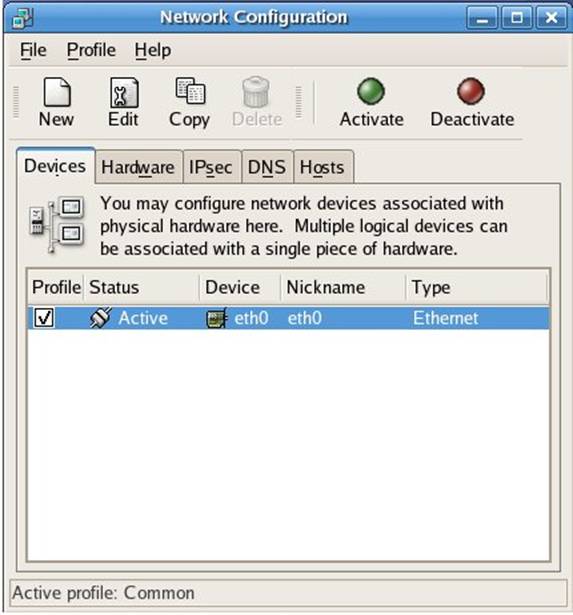
| After configuring the Ethernet device, it appears in the device list. |
| |

|
| |
| Be sure to select File => Save to save the changes. |
| |
| After adding the Ethernet device, you can edit its configuration by selecting the device from the device list and clicking Edit. |
| |
| When the device is added, it is not activated immediately, as seen by its Inactive status. To activate the device, select it from the device list, and click the Activate button. If the system is configured to activate the device when the computer starts (the default), this step does not have to be performed again. |
| |
| |
| |
| |
| |
