| Illustrator Tools |
| |
| Painting Tools |
| |
| Gradient tool |
 |
|
| |
| By clicking on the gradient bar in the Gradient Pallet you can add new gradation points. This gives you the multiple banding effect that is necessary to render a reflective metallic surface. You can control the color in each new gradation point introduced by double clicking on that point and using the "Color Pallet" to modify it's color properties. |
| |
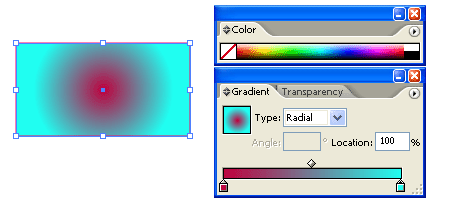 |
| Figure showing gradient effect on rectangle |
| |
| Gradient mesh tool |
 |
|
| |
| The gradient mesh tool in Illustrator is one of the most complex confusing and dynamic tools. The results you can get from using it are amazing, but it does come with a price - the difficulty of learning it. |
| |
| This tool is used to render complex gradations and shapes. It is also accessed through Illustrator's Tool pallet. Once a gradient "Mesh" has been created you will notice a grid pattern overlaying your shape. The grid is controlled in much the same way as you would control Illustrator's Pen Tool. You can drag anchor points and add them just as you would with the Pen tool. |
| |
| Unlike the Gradient Tool (G), the Gradient Mesh tool does not make use of the Illustrator Gradient Pallet shown in figure below. It is totally controlled by manipulating the anchor points on the grid "mesh". You will notice that the center anchor point in Fig below is active (solid) and that the grey color it is introducing into our black square is shown as the "Fill" color on the Tool Pallet. |
| |
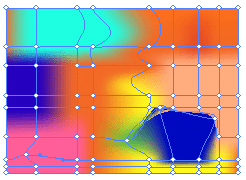 |
| Figure showing effect of gradient mesh tool on rectangle |
| |
| Paint Brush Tool |
 |
|
| |
| This tool operates very much like a paint brush. You can create calligraphy or scatter library items like leaves or patterns along a path. |
| |
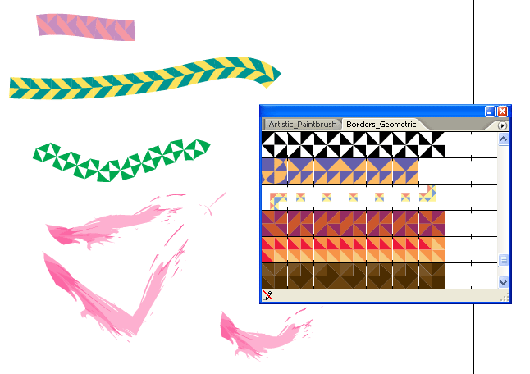 |
| Figure showing paint brush library |
| |
 |
| |
| Figure showing paint brush tool preference dialog box |
| |
| |
|
| |