| Tips and Tricks in CorelDraw |
| |
| An Overview on Fountain Fills |
| |
| In this tutorial you will learn about the basics of fountain fill in Corel DRAW. |
| |
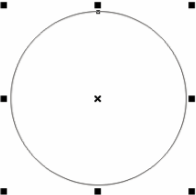
| . Draw circle. Keep it selected. |
| |
 |
| |
| . Click "Fountain Fill Dialog" from Fill Tool. |
 |
|
| |
 |
| |
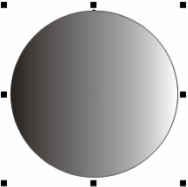
| . Linear fill type is selected by default. Click ok and check out the effect. |
| |
 |
| |
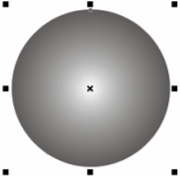
| . Open Fountain Fill again and change Linear Fill type to Radial. Click ok. Observer the result. |
| |
 |
| |
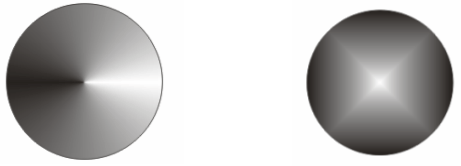
| . Try Conical and Square fill types. |
| |
| . Please do not change any other settings. |
| |
| . This is the image showing different types of fill, in a clockwise manner from top left, they are Linear, Radial, Square and Conical. |
| |
 |
| |
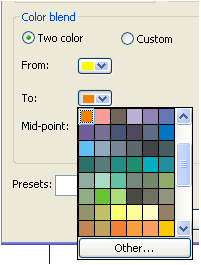
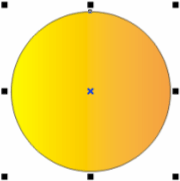
| . Select Linear fill type and Two Color is selected by default. Select two different colors from "From and To" drop down menu under color blend |
| |
 |
| |
| . Click ok and observer the result. |
| |
 |
| |
| Fountain Fill in Text |
| |
| You can also apply fountain fill on text . Text is no different from any other object as it is since your text remains editable even with a fountain fill. Although, the entire word is treated as one object and the fill runs continuously through the object. |
| |
| To convert text into object select your text, and choose Arrange>Convert to Curves to create individual objects from each character. Since the text has been converted to a graphic object, however, you cannot edit it as text after performing this conversion. |
| |
 |
| This image shows the selection just after the second character was filled. |
| |
| Fountain Fill in the outline of the text |
| |
| You cannot fill an outline with a fountain fill. You can however choose Arrange>Convert Outline to Object from the main menu. Just as it sounds, it takes the outline and turns it into an object, separate from the object it used to outline. While it can make some great effects on objects, it is really powerful when you take one extra step and use it on text. |
| |
| Create your text. Apply a fairly thick outline - I have used a 20px outline for 140pt text for the example shown here. (The original text was 140pts but I made it smaller on export to fit.) Increase your letter spacing if necessary, since the outline tends to join letters together. |
| |
| Now let's start the magic. Choose Arrange>Convert Outline to Object. The outline becomes a separate object. The sample at the left shows the text with regular outline first, with the outline moved away from the text in the second sample. Fill with the fountain fill you desire ... neat effect. If you really want to push the technique, start with your characters spread further apart, and apply an outline to the original outline. You may find the result is better when you specify a wide outline. Then open the Outline Pen window through the Outline Pen tool, and check Behind Fill, located at the bottom left of the window. This sends the outline behind the object and can be easier to control the effect. |
| |
|
| |
|
| |