| Tips and Tricks in CorelDraw |
| |
| Creating Beautiful Patterns |
| |
| In this tutorial you will learn how you can create beautiful patterns in coreldraw.
There are many ways to create patterns. We can use Artistic media tool, creation of pattern using transformation of object and using blend effect etc. |
| |
| An example below here explains how to create patterns using the transformation & blend effect on object. |
| |
| . Click on Ellipse Tool. |
| |
| . Draw ellipse. |
| |
| . Fill ellipse with green color and yellow outline. |
| |
 |
| |
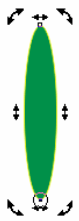
| . Click two times on ellipse to reveal the rotation arrows. |
| |
| . Click and drag the center of rotation to the bottom of the ellipse as shown in figure below |
| |
 |
| |
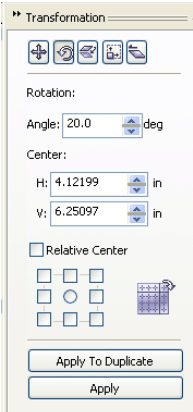
| . Click on Arrange | Transform | Rotate to bring up the rotation dialog box. |
| |
 |
| |
| . Enter the number 20 in the Angle parameters box. |
| |
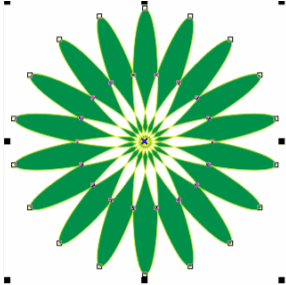
| . Click on the Apply to duplicate button 23 times. You should now have 24 ellipses in a circle as shown in figure below. |
| |
 |
| |
| . Select Pick Tool. |
| |
| . Marquee select all 24 ellipses |
| |
| . Click on the Combine button on the property Bar. Your image would look like as shown below: |
| |
 |
| |
| . Now, duplicate this image by clicking Ctrl+D. |
| |
| . Drag and make this duplicate image smaller than the original. |
| |
| . Fill it with red color and yellow outline. |
| |
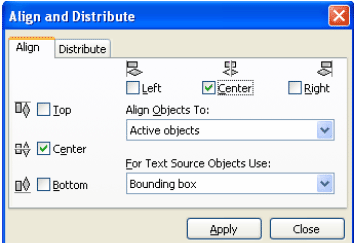
| . Select both shapes and press C and E or click on the Align button on the Property Bar. A dialog box will appear on the screen as shown below. |
| |
 |
| |
| . When the Align dialog box appears, check the center boxes in both the horizontal and vertical rows. |
| |
| . With then two shapes still selected, blend them together using a 10 step blend. Your finished image should look like as in figure below: |
| |
 |
| |
| An example below here explains how to create flower patterns using the transformation & blend effect on object. |
| |
| . Click on Ellipse Tool. |
| |
| . Draw ellipse. |
| |
| . Fill it with pink color. |
| |
 |
| |
| . Press + Key to duplicate this ellipse. |
| |
| . Drag and make that duplicate ellipse smaller than original. |
| |
| . Fill it with red color as shown in figure below. |
| |
 |
| |
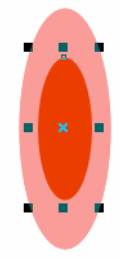
| . Select both objects and Press C+B to align center and bottom as shown in figure below: |
| |
 |
| |
| . Blend the two shapes using a 10 steps blend. Your image would look something like this. |
| |
 |
| |
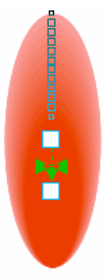
| . Move the center of rotation thumbtack to the bottom of the blended petal. Now your drawing should look something like this. |
| |
 |
| |
| . Marquee select the object and click Ctrl +G to group it. |
| |
| . Click two times to reveal the rotation arrows. |
| |
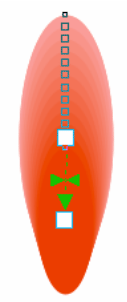
| . Click and drag the center of rotation to the bottom . |
| |
| . Open the Rotation roll-up by clicking on Arrange | Transform | Rotate. |
| |
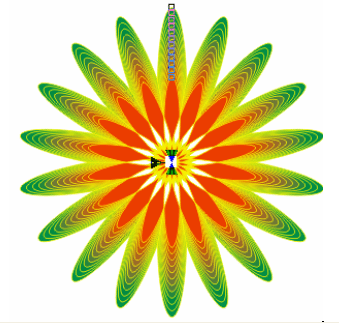
| . Enter the number 45 in the Angle parameters box and click on Apply to Duplicate 7 times to create the flower as shown in figure below. |
| |
 |
| |
| . Using the ellipse tool, create a small circle and fill it with a radial fill of Orange to Yellow. Place it in the center of the flower. |
| |
| . Select all the petals and the radial filled circle and group them together using the Group button on the Property Bar. That's it, you just created a flower. |
| |
 |
| |
|
| |