| Forms |
| |
| Form control |
| |
| This page explains the uses for other
types of form controls including lists, combo boxes, checkboxes,
option groups, and command buttons. |
| |
| List and Combo Boxes |
| If there are small, finite
number of values for a certain field on a form, using combo
or list boxes may be a quicker and easier way of entering data.
These two control types differ in the number of values they display.
List values are all displayed while the combo box values are not
displayed until the arrow button is clicked |
| 1. Open the form in Design View. |
| |
| 2. Select View|Toolbox to view the
toolbox and make sure the "Control Wizards" button is pressed in. |
| |
| 3. Click the list or combo box tool button
and draw the outline on the form. The combo box wizard dialog box will appear. |
| |
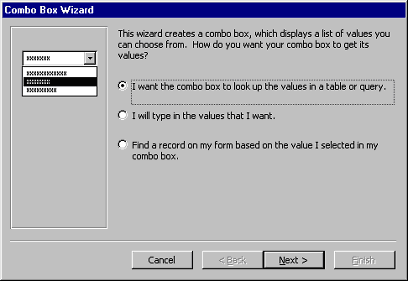
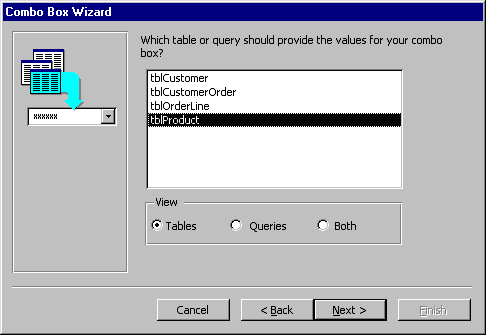
| 4. Select the source type for the list or
combo box values and click Next >. |
| |
|
| |
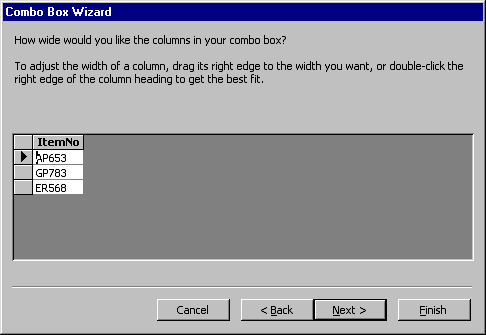
| 5. On the next dialog box, set the width
of the combo box by clicking and dragging the right edge
of the column. Click Next >. |
| |
|
| |
|
| |
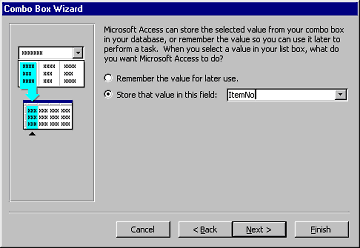
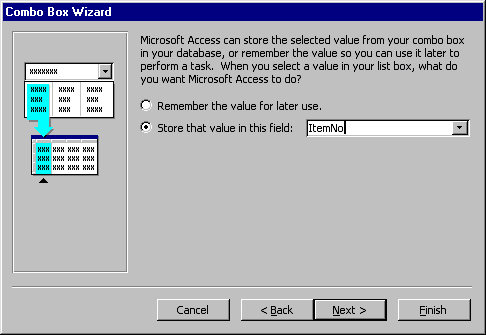
| 6. The next dialog box allows tells Access what to do
with the value that is selected. Choose "Remember the value for
later use" to use the value in a macro or procedure (the value
is discarded when the form is closed), or select the field that
the value should be stored in. Click Next > to proceed to the final screen. |
| |
|
| |
| |
| Check Boxes and Option Buttons |
| Use check boxes and option buttons to display yes/no,
true/false, or on/off values. Only one value from a group of
option buttons can be selected while any or all values from a
check box group can be chosen. Typically, these controls should
be used when five or less options are available. Combo boxes or
lists should be used for long lists of options. To add a
checkbox or option group: |
| 1. Click the Option Group tool on the toolbox and
draw the area where the group will be placed on the form with
the mouse. The option group wizard dialog box will appear. |
| |
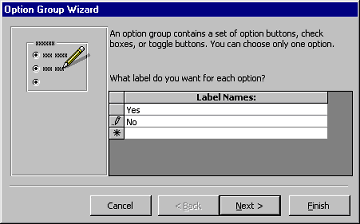
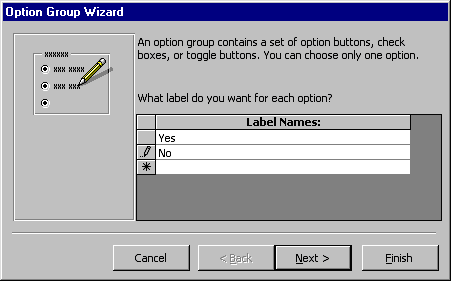
| 2. On the first window, enter labels for the options
and click the tab key to enter additional labels. Click
Next > when finished typing labels |
| |
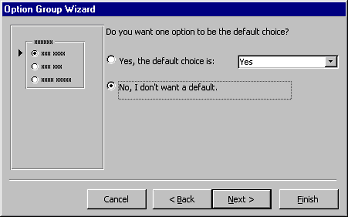
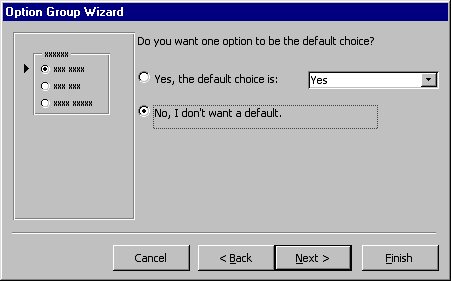
| On the next window, select a default value if there is any and click Next >. |
| |
|
| |
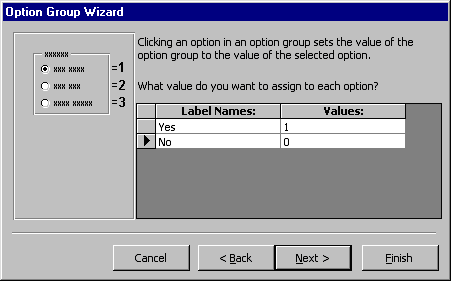
| Select values for the options and click Next >. |
| |
|
| |
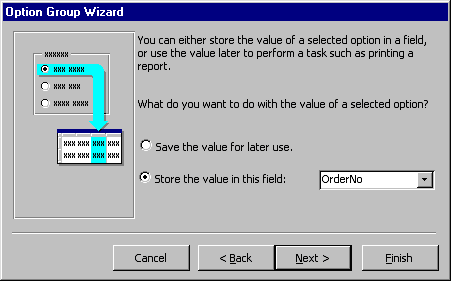
| Choose what should be done with the value and click Next >. |
| |
|
| |
| Type the caption for the option group and click Finish. |
| This page explains the uses for other types of form
controls including lists, combo boxes, checkboxes, option
groups, and command buttons. |
| |
| |
| List and Combo Boxes |
| If there are small, finite number of values for a certain
field on a form, using combo or list boxes may be a quicker and easier
way of entering data. These two control types differ in the number of
values they display. List values are all displayed while the combo boxvalues are not displayed until the arrow button is clicked to open it. |
| 1. Open the form in Design View. |
| |
| 2. Select View|Toolbox to view the toolbox and make
sure the "Control Wizards" button is pressed in. |
| |
| 3. Click the list or combo box tool button and draw
the outline on the form. The combo box wizard dialog box will appear. |
| |
| 4. Select the source type for the list or combo box values and click Next >. |
| |
|
| |
| 5. Depending on your choice in the first dialog box, the next
options will vary. If you chose to look up values from a table or query, the
following box will be displayed. Select the table or query from which the
values of the combo box will come from. Click Next > and choose fields from
the table or query that was selected. Click Next > to proceed. |
| |
|
| |
| 6. On the next dialog box, set the width of the combo
box by clicking and dragging the right edge of the column. Click Next >. |
| |
|
| |
| 7. The next dialog box allows tells Access what to do
with the value that is selected. Choose "Remember the value for
later use" to use the value in a macro or procedure (the value
is discarded when the form is closed), or select the field that
the value should be stored in. Click Next > to proceed to the final screen. |
| |
|
| |
| 8. Type the name that will appear on the box's label and click Finish. |
| |
| |
| Check Boxes and Option Buttons |
| Use check boxes and option buttons to display yes/no,
true/false, or on/off values. Only one value from a group of option
buttons can be selected while any or all values from a check box
group can be chosen. Typically, these controls should be used when
five or less options are available. Combo boxes or lists should be
used for long lists of options. To add a checkbox or option group: |
| 1. Click the Option Group tool on the toolbox and draw
the area where the group will be placed on the form with the mouse.
The option group wizard dialog box will appear. |
| |
| 2. On the first window, enter labels for the options
and click the tab key to enter additional labels. Click
Next > when finished typing labels. |
| |
|
| |
| 3. On the next window, select a default value if there is any and click Next >. |
| |
|
| |
| 4. Select values for the options and click Next >. |
| |
|
| |
| 5. Choose what should be done with the value and click Next >. |
| |
|
| |
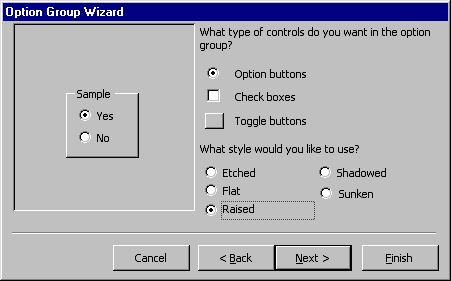
| 6. Choose the type and style of the option group and click Next >. |
| |
|
| |
| 7. Type the caption for the option group and click Finish. |
| |
| |
|
| |
| |