| Drawing in Indesign |
| |
| Drawing with Pen and Pencil Tool |
| |
Drawing with Pencil Tool  |
| |
| You use this tool as if you were using a real pencil and paper. Here are a few things you might want to know while you are using this tool. |
| |
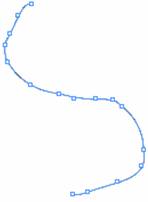
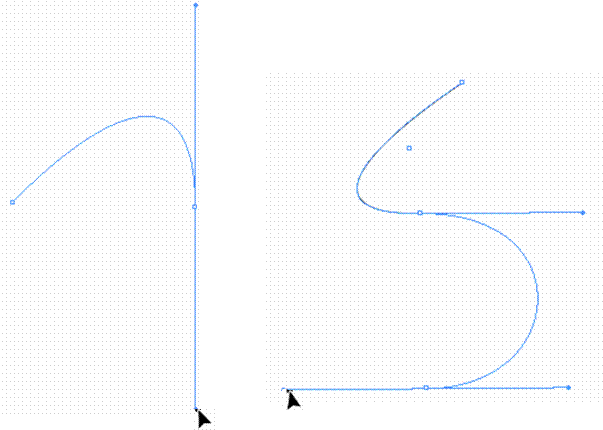
| Anchor points are automatically set down as you draw with the Pencil tool. The number of anchor points is due to the length of the path and by tolerance settings in the Pencil Tool Preferences dialog box. |
| |
 |
| |
| Drawing Freeform Paths with Pencil Tool |
| |
1. Click on Pencil tool.
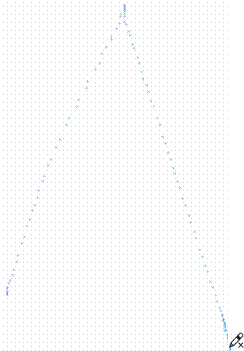
2. Drag on the document window to draw a path. The Pencil tool displays a small x to indicate drawing a freeform path.
As you drag, a dotted line follows the pointer. Anchor points appear at both ends of the path and at various points along it. The path takes on the current stroke and fill attributes, and remains selected by default. |
| |
 |
| |
| Drawing closed path with Pencil Tool |
| |
• Click on Pencil tool.
• Drag and press Alt Key. The Pencil tool displays a small circle (and, in InDesign, a solid eraser) to indicate that you’re creating a closed path.
• After drawing the path, release the mouse button but not the Alt key. After the path closes, release the Alt key. |
| |
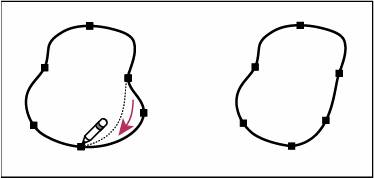
| Reshaping Paths with Pencil Tool |
| |
• Select the path to change.
• Position the Pencil tool near the path.
• When the small x disappears from the tool drag the tool until the path is the desired shape. |
| |
 |
| |
Drawing with Pen Tool |
| |
| Drawing Straight Lines segments with Pen Tool: |
| |
• Select Pen Tool.
• Click on the document window and do not drag.
• Click again anywhere in the document window to finish segment point.
• Continue clicking to set anchor points for additional straight segments.
• To close the path, position the Pen tool over the first (hollow) anchor point. A small circle appears next to the Pen tool pointer when it is positioned correctly. Click or drag to close the path. |
| |
 |
| |
| Drawing Curved Lines with Pen Tool |
| |
• Select Pen tool.
• Position the Pen tool where you want the curve to begin, and hold down the mouse button.
• The first anchor point appears, and the Pen tool pointer changes to an arrowhead.
• Drag to set the slope of the curve segment you’re creating, and then release the mouse button.
• Hold down the Shift key to constrain the tool to multiples of 45°. |
| |
 |
| |
| • To create an S shaped curve, drag in the same direction as the previous direction line. Then release the mouse button. |
| |
| Drawing straight lines followed by Curves |
| |
| • Select Pen tool, click corner points to create a straight lines. |
| |
 |
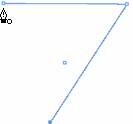
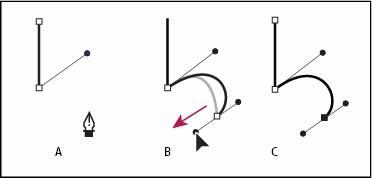
| Drawing a straight segment followed by a curved segment |
| A. Straight segment completed
B. Positioning Pen tool over endpoint
C. Dragging direction point |
| |
| • Position the pen where you want the next anchor point; then click (and drag, if desired) the new anchor point to complete the curve. |
| |
 |
| Drawing a straight segment followed by a curved segment (part 2) |
| A. Positioning Pen tool
B. Dragging direction line
C. New curve segment completed |
| |
| Drawing curves followed by straight lines |
| |
1. Using the Pen tool, drag to create the first smooth point of the curved segment, and release the mouse button.
2. Reposition the Pen tool where you want the curved segment to end, drag to complete the curve, and release the mouse button. |
| |
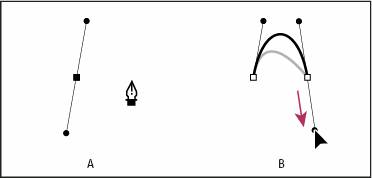 |
| Drawing a curved segment followed by a straight segment |
| A. First smooth point of curved segment completed and Pen tool positioned over endpoint
B. Dragging to complete the curve |
| |
3. Position the Pen tool at the endpoint. A convert-point icon appears when it is positioned accurately. Click anchor point as to convert the smooth point to a corner point.
4. Click Pen tool at the position where you want the straight segment to end. |
| |
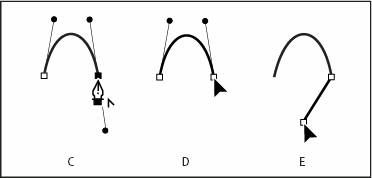 |
| Drawing a curved segment followed by a straight segment |
| C. Positioning Pen tool over existing endpoint
D. Clicking endpoint
E. Clicking next corner point |
| |
| Click on Drawing in InDesign to view animated presentation. |
| |
|
| |