| Creating & Customizing |
| |
| Method for Create a Table |
| |
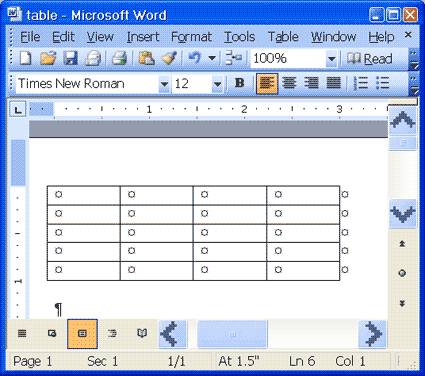
| 1. Choose Table > Insert > Table from the menu. The Insert Table dialog box opens. |
| |
| 2. Type 4 in the Number of Columns field. |
| |
| 3. Type 5 in the Number of Rows field. |
| |
| 4. Select Auto in the Column Width field. Selecting Auto allows Microsoft Word to determine the size of your column widths. Alternatively, you can enter the column width you desire. |
| |
| 5. Click OK. Your table should look like the one shown here, with four columns and five rows. |
| |
 |
| |
| Alternate Method -- Creating a Table by Using the Insert Table Icon |
| |
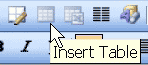
| You can also create a table by clicking on the Insert Table icon on the Standard toolbar. |
| |
| 1. Click the Insert Table icon. |
| |
 |
| |
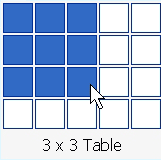
| 2. Highlight the number of rows and columns you need. The maximum table size you can create by this method is a four-row by five-column table. |
| |
 |
| |
| 3. Press Enter (or click) to create the table. |
| |
| Moving Around a Table |
| |
| Each block in a table is called a cell. Use the Tab key to move from cell to cell from left to right. Use Shift-Tab to move from cell to cell from right to left. The following exercise demonstrates. |
| |
1.	Click in the first cell in the first column.
2.	Press the Tab key nine times. The cursor moves forward nine cells.
3.	Press Shift-Tab six times. The cursor moves backward six cells.
|
| |
| For Animated presentation Click here |
| |
| |
|
| |
| |