| New Web Server Controls in ASP.Net 2.0 |
| |
| An Example of Using New Web Server Controls |
| |
| How to Add the New Web Server Controls in Web Page? |
| |
1. Open a web page in Design View.
2. Click on Toolbox tab to make it available to use.
3. Select the âStandard? item in the Toolbox.
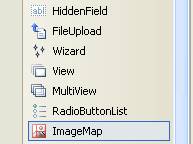
4. On select âStandard? you will get the listing on Standard web server controls (you can see some of the new controls in the figure below). |
| |
 |
| |
| 5. Select the control and keeping mouse button pressed drag it to the web page. |
| |
| In this example the used Web Server controls are following: |
| |
Label
Textbox
HiddenField
Wizard
FileUpload
ImageMap
Bulleted List
RadioButton List |
| |
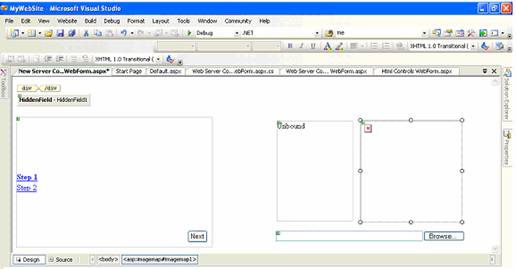
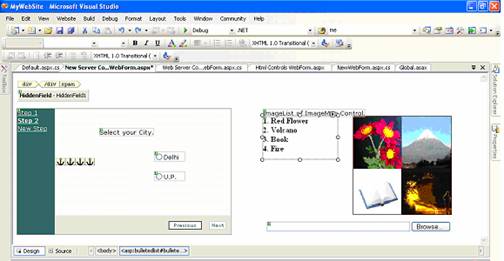
| After dropping all the web server controls, your web page in Design View will look like as given in the figure below. |
| |
 |
| |
6. Select the control using mouse then click on âProperties Window? tab to modify the properties like Text, ID, font size, font family etc.
7. Enter the text in front of Text property and press Enter key. |
| |
| Note: Here you can see the Image Button control (which contains a small image with âX? in red color). |
| |
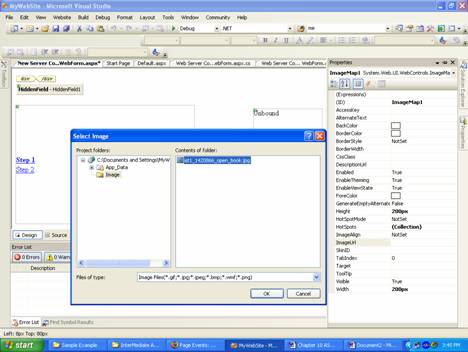
To set an image url or source, set it using âImageUrl? of Image Map control, you can write path of the url or source and also can browse the location using this button as given in the figure given below. as given in the figure given below. |
| |
 |
| |
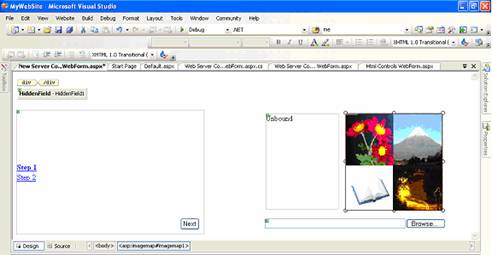
| Here this is a single image used in this example for Image Map control as given below in figure. |
| |
 |
| |
| How to set format of the Wizard web server control? |
| |
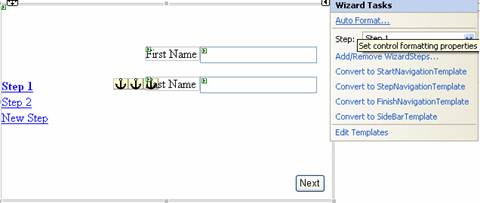
1. Select the Wizard control in Design View(see figure below)
2. Use any of the two methods given below:
i. Right click and select âAutoFormatâ¦? from the Properties pop menu.
ii. Click on (smart tag) then select âAutoFormatâ¦? from Wizard Tasks |
| |
 |
| |
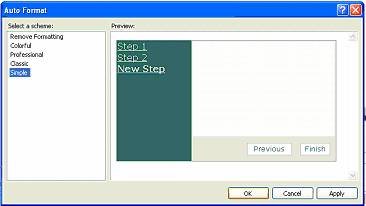
| 3. In the AutoFormat dialog box, Select the given Formats and press âOK? button (see figure below) |
| |
 |
| |
| How to add item to Bulleted list control? |
| |
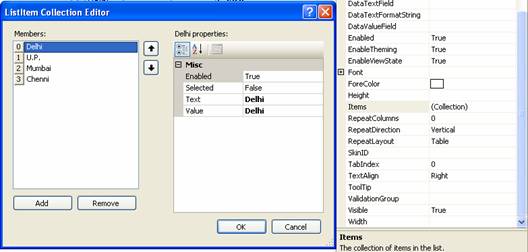
1. Select the Bulleted list control
2. Click on Properties window and select âItems? property and press this button to open âListItem Collection Editor?.
3. In âListItem Collection Editor?, press âAdd? button.
4. Enter text in âText? property and press âOK? |
| |
 |
| |
| How to set Style for Bulleted list control? |
| |
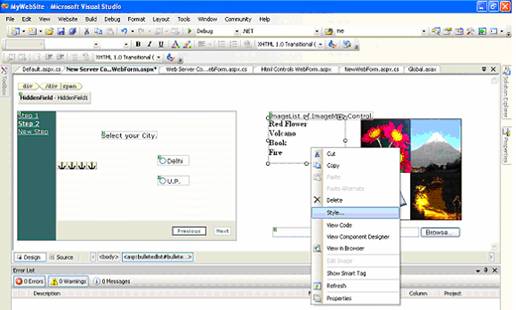
1. Select the Bulleted list control
2. To open Style Builder, right click the mouse button then click on âStyleâ¦? option. |
| |
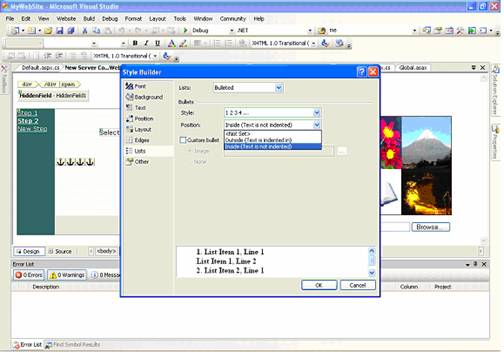
| On selecting âStyleâ¦? you will get the Style Builder dialog box as given following. |
| |
 |
| |
| In Style Builder select the âLists? option then select Position drop down list and set to âInside? then press âOK? to apply the settings. |
| |
| Here in figure given below you can see the difference in Bulleted List control. |
| |
 |
| |
| How to Add the New Wizard Step? |
| |
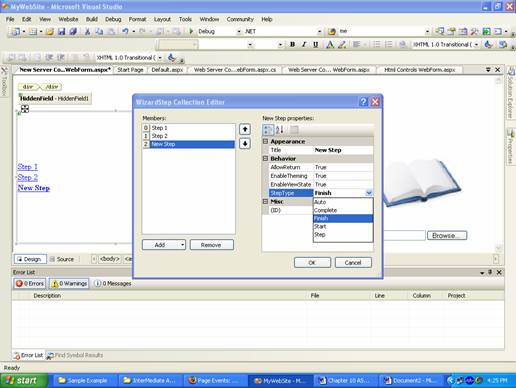
1. Select the Wizard control
2. Click on Properties window and select âWizard Steps? property and press this button to open âListItem Collection Editor?.
3. In âWizardSteps Collection Editor?, press âAdd? button.
4. Enter text in âTitle? property and set the âStepType? property using dropdown list in front it.
5. Select the âStepType? property according to the flow of your wizard
6. Press âOK? to apply setting. |
| |
 |
| |
| How create the Steps in the Wizard Control? |
| |
1. In the Wizard control, select the âStep1?
2. Drag and drop the controls from the Toolbox as given in the figure below.
3. Similarly select âStep2?, then again add controls as per your wizards requirements |
| |
| In this example, the used Web Controls in the Wizards Steps are following |
| |
| In Step1: Two Labels and two Textboxes. |
| |
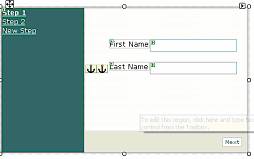 |
| |
| In Step2: One Label and one RadioButtonList. |
| |
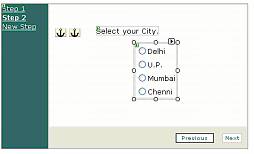 |
| |
| In New Step: One Label. |
| |
 |
| |
| How to set the HotSpot in the ImageMap control? |
| |
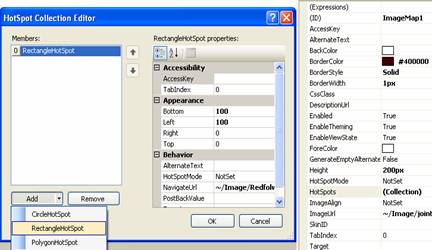
1. Select the ImageMap controls
2. Click on Properties window and select âHotSpots? property and press this button to open âHotSpots Collection Editor?.
3. In âHotSpots Collection Editor?, press âAdd? button.
4. You can select âHotSpots? Types on clicking this portion of âAdd? button (see in figure given below).
5. Set the properties (in case of rectangle) like Bottom, Top, Left, and Right for deciding the co-ordinates âHotSpot? area and also locate the source or navigational url for the âNavigateUrl? property otherwise you can enter text in âAlternateText? property.
6. Press âOK? to apply setting. |
| |
 |
| |
|
After setting four âHotSpot? areas for the ImageMap control press âOK? button as given in figure below. |
| |
| How to add item to RadioButton list control? |
| |
1. Select the RadioButton list control
2. Click on Properties window and select âItems? property and press this button to open âListItem Collection Editor?.
3. In âListItem Collection Editor?, press âAdd? button.
4. Enter text in âText? property and press âOK? |
| |
 |
| |
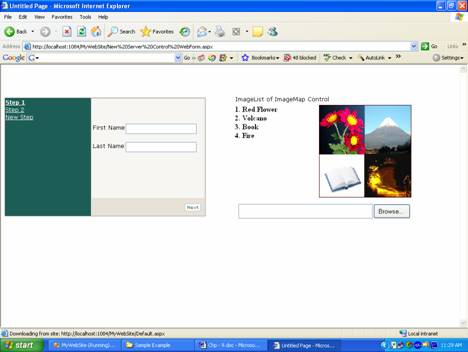
| Now add the âFile Upload? control by dragging and dropping in the Web page then Web Page in Design View look like the figure given below. |
| |
 |
| |
| Press F5 to run the web page |
| |
 |
| |
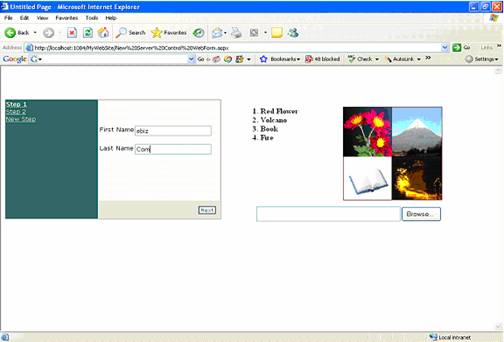
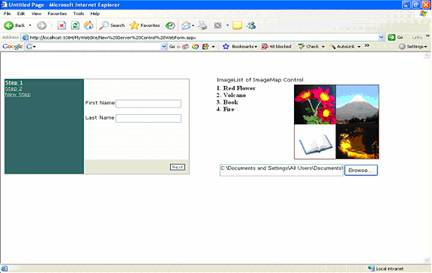
| In this figure, Wizard control is set at âStep1? and show controls available for this step. |
| |
| Now enter text (optional) value in Textboxes given in front of âFirstName? and âLastName? |
| |
 |
| |
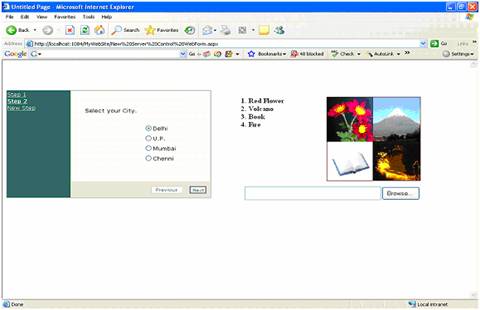
| Then press âNext? button to open the next step which is âStep2? of the Wizard control. |
| |
| Here you can select your city (optional) and press âNext? button to open the Final step. |
| |
 |
| |
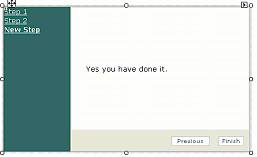
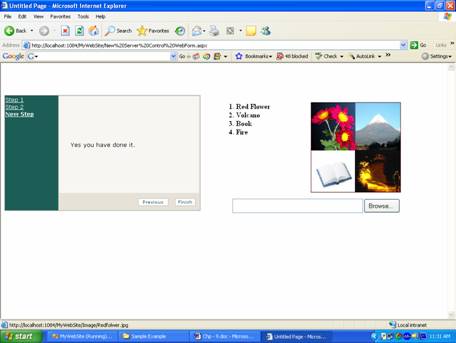
| Here all the Wizards controlâs Steps have been completed. |
| |
 |
| |
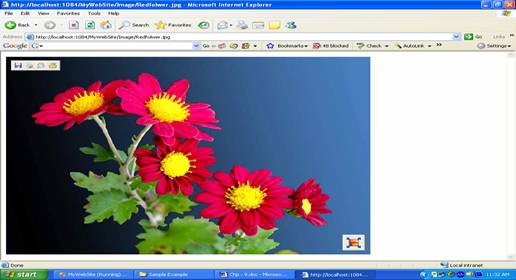
| In figure given above, if you click on the âHotSpot? area over the ImageMap control then linked image or web page will be opened as given in the figure below. |
| |
 |
| |
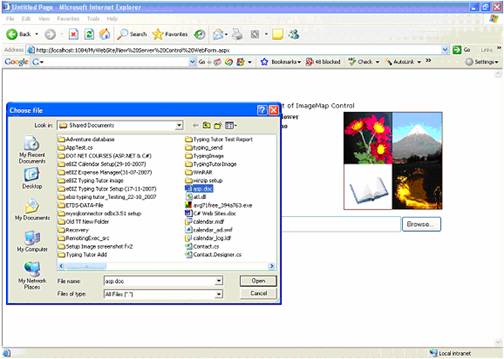
| If you click on âBrowse? button of the âFileUpload? control then âChoose file? dialog box will opened, select to upload the file and press open. |
| |
 |
| |
| Then path or location of the opened file is available in the Textbox like control of the âFileUpload? control as given in the figure below. |
| |
 |
| |
|
| |