| Working with Visual Studio 2005 |
| |
| An Example for using Visual Studio NET 2005 |
| |
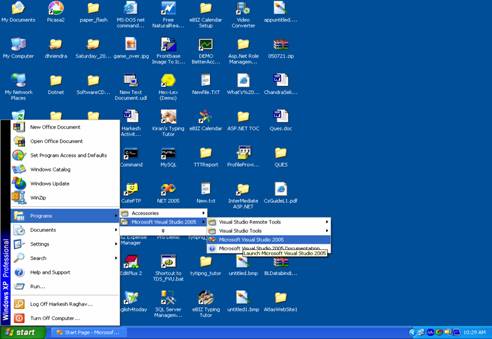
| How to open Visual Studio 2005? |
| |
| Figure 1 |
| |
 |
| |
| Steps to open Visual Studio 2005 |
| |
1. Click on Start.
2. Select Programs.
3. Select Microsoft Visual Studio 2005 folder.
4. Select Microsoft Visual Studio 2005 with this icon. |
| |
| Note: Also see the figures given to display steps and you can see the enlarge view of figures using Zoom option given in View Menu by setting Zoom percents of Ms Word application. |
| |
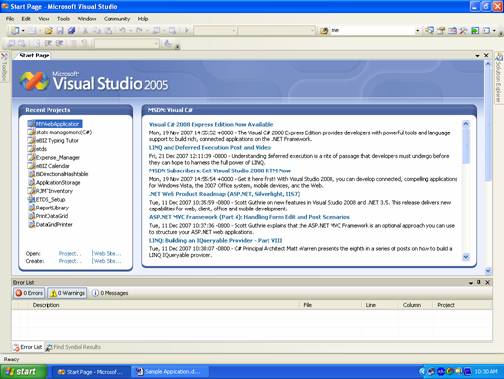
| Then Start Page of Visual Studio 2005 will open as given in Figure2. |
| |
| Figure2 |
| |
 |
| |
| On Start Page you will find two main windows. |
| |
1. Recent Projects window
2. MSDN online information window |
| |
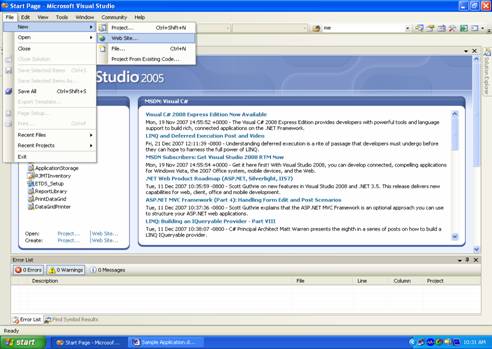
| How to create the new Web Site or Web Application? |
| |
 |
| |
| Steps to create Web Site or Web Application |
| |
1. Click on File Menu
2. Select New Menu item
3. Then select âWeb Siteâ¦? or Project options (in this example we have selected âWeb Siteâ¦? option) |
| |
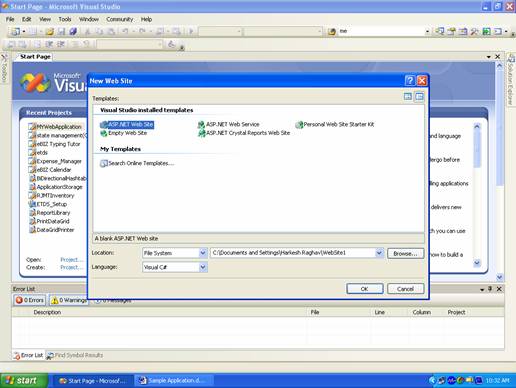
| Then you will find a âNew Web Site? dialog box window as given in figure3. |
| |
| Figure3 |
| |
 |
| |
1. Select ASP.NET Web Site template.
2. Click âBrowseâ¦? to change the default location of the Web Site or Project.
3. Select language in which you are going to code the Web Site.
4. Press âOK? |
| |
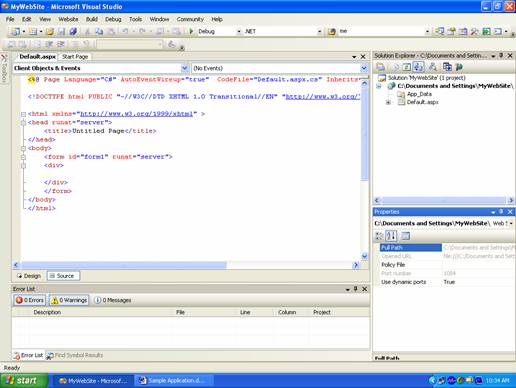
| Then you will get the âDefault.aspx? web page in âSource View? as given in figure4. |
| |
| Figure4 |
| |
 |
| |
| You can also write code here in <form>⦠</form> tags but not now. |
| |
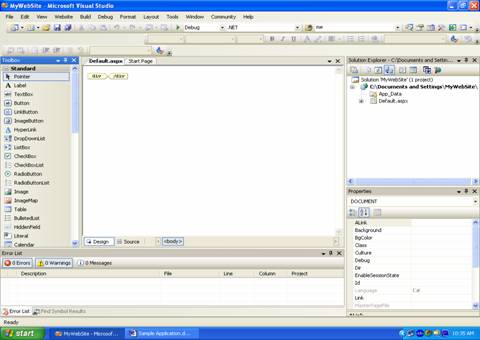
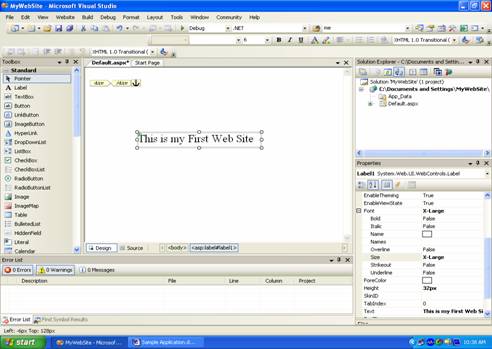
| Click on âDesign View? to make it simple and then Default.aspx web page will be shown in Design View as given in figure5. |
| |
| Figure5 |
| |
 |
| |
| This is Design View of Default.aspx web page. |
| |
| You can change the name of Default.aspx web page to your own defined by using following steps. |
| |
1. Select Default.aspx in the Solution Explorer
2. Click the Right button of the mouse
3. Choose the âRename? option
4. Write the name and press Enter key. |
| |
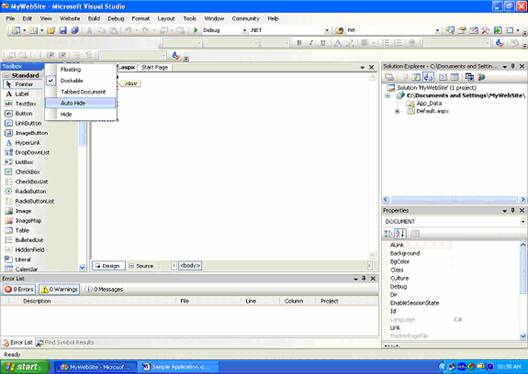
| You can change the availability of showing the tabs by setting the âAuto Hide? on pressing right click on tabs. Then tabs will appear on keeping the mouse over the tab. |
| |
| Figure6 |
| |
 |
| |
| In above given figure6 we set the Toolbox appearance to âAutoHide?. |
| |
| How to add control to the Web Page? |
| |
| Figure7 |
| |
 |
| |
| Steps to add the controls |
| |
1. Select the control from Toolbox
2. Press the Left mouse button
3. Dragged the control and drop it in the âDesign View? of Default.aspx web page. |
| |
| How to set the properties from Properties Window? |
| |
| Figure8 |
| |
 |
| |
| To set the properties in Properties Window |
| |
1. Select the control
2. Click the Right mouse button and select the properties from option |
| |
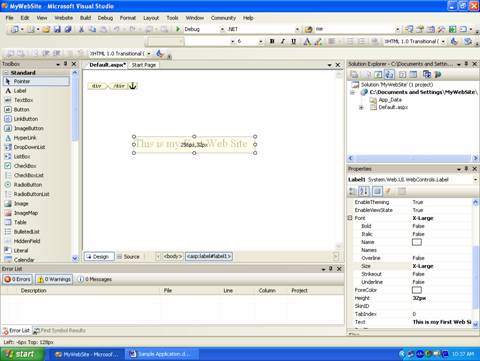
| Or simply click the Properties Window tab present in the left hand side or make available by pressing Properties Window icon. |
| |
3. Click on property you want to set and enter value or Select the values from options (here we have changed the Text property).
4. Press the Enter key. |
| |
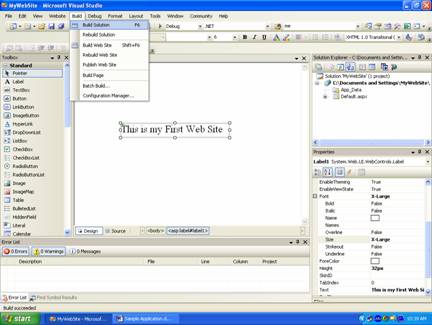
| How to build the Web Site or Web Application? |
| |
| Figure9 |
| |
 |
| |
| To Build the Web Site or Web Application |
| |
1. Click on Build Menu or Press F6 key.
2. Click on âBuild Solution? option
3. Then wait to building or compilation process.
4. After completion of build process you will get the âBuild Succeeded? message. |
| |
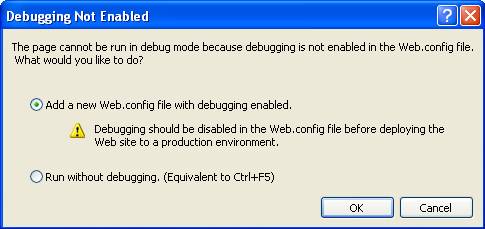
| How to Run the Web Site or Web Application? |
| |
| Figure10 |
| |
 |
| |
| To Run the Web Site or Web Application |
| |
1. Click on Debug
2. Select and click on Start Debugging or Press F5 key
3. If you are creating the Web Site then you will face the figure10 as message after starting the debugging. No message in case of Web Application.
4. Select the first option and press âOK? |
| |
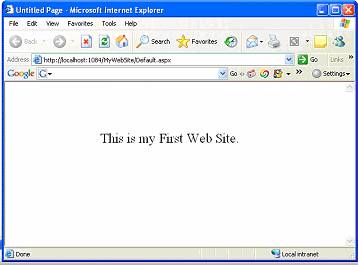
| Then you will find the web page as an output of your Web Site as given in figure11. |
| |
| Note: It will take some time to appear the Web Site, when you run this Web Site first time so wait for some time to appear it. |
| |
| Figure11 |
| |
 |
| |
|
| |